 RSS Feed
 Twitter
Finally Skinning Begins
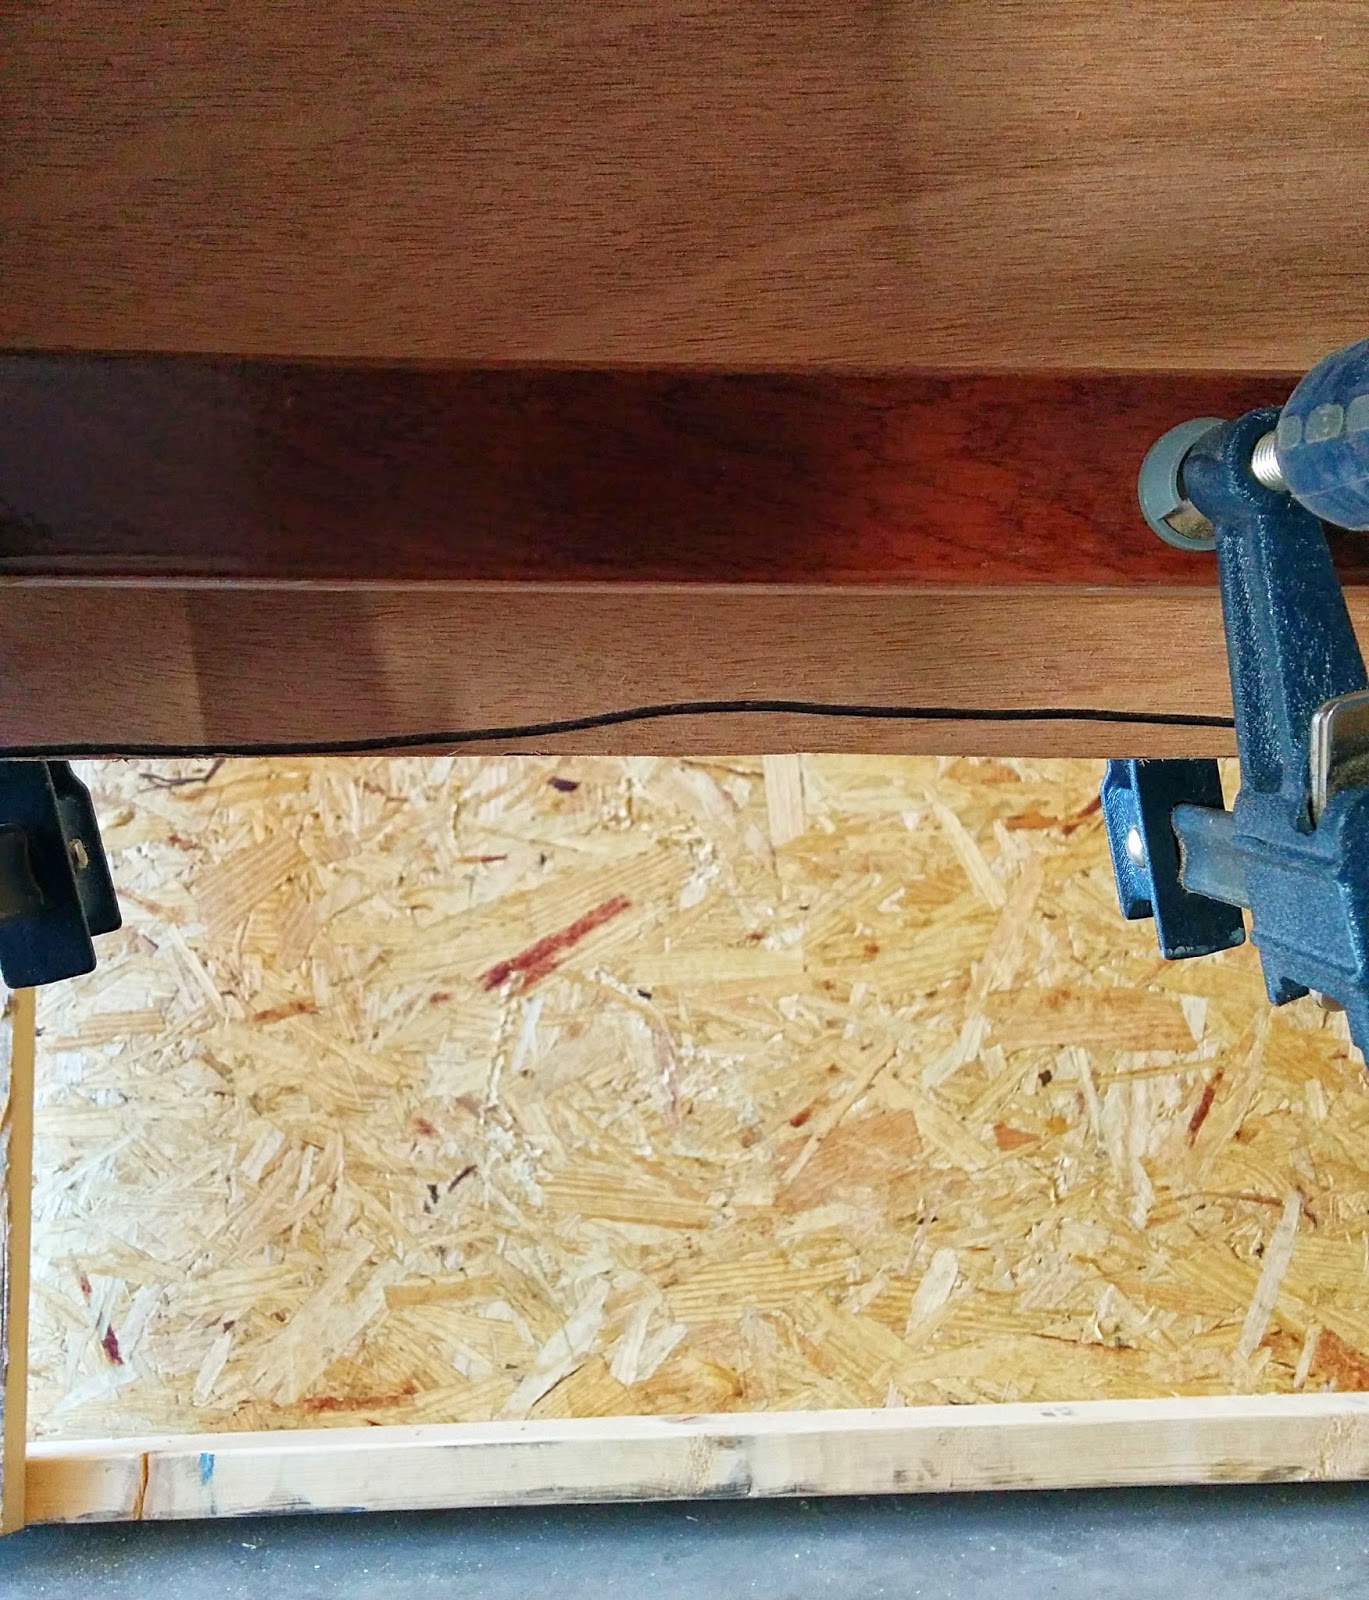
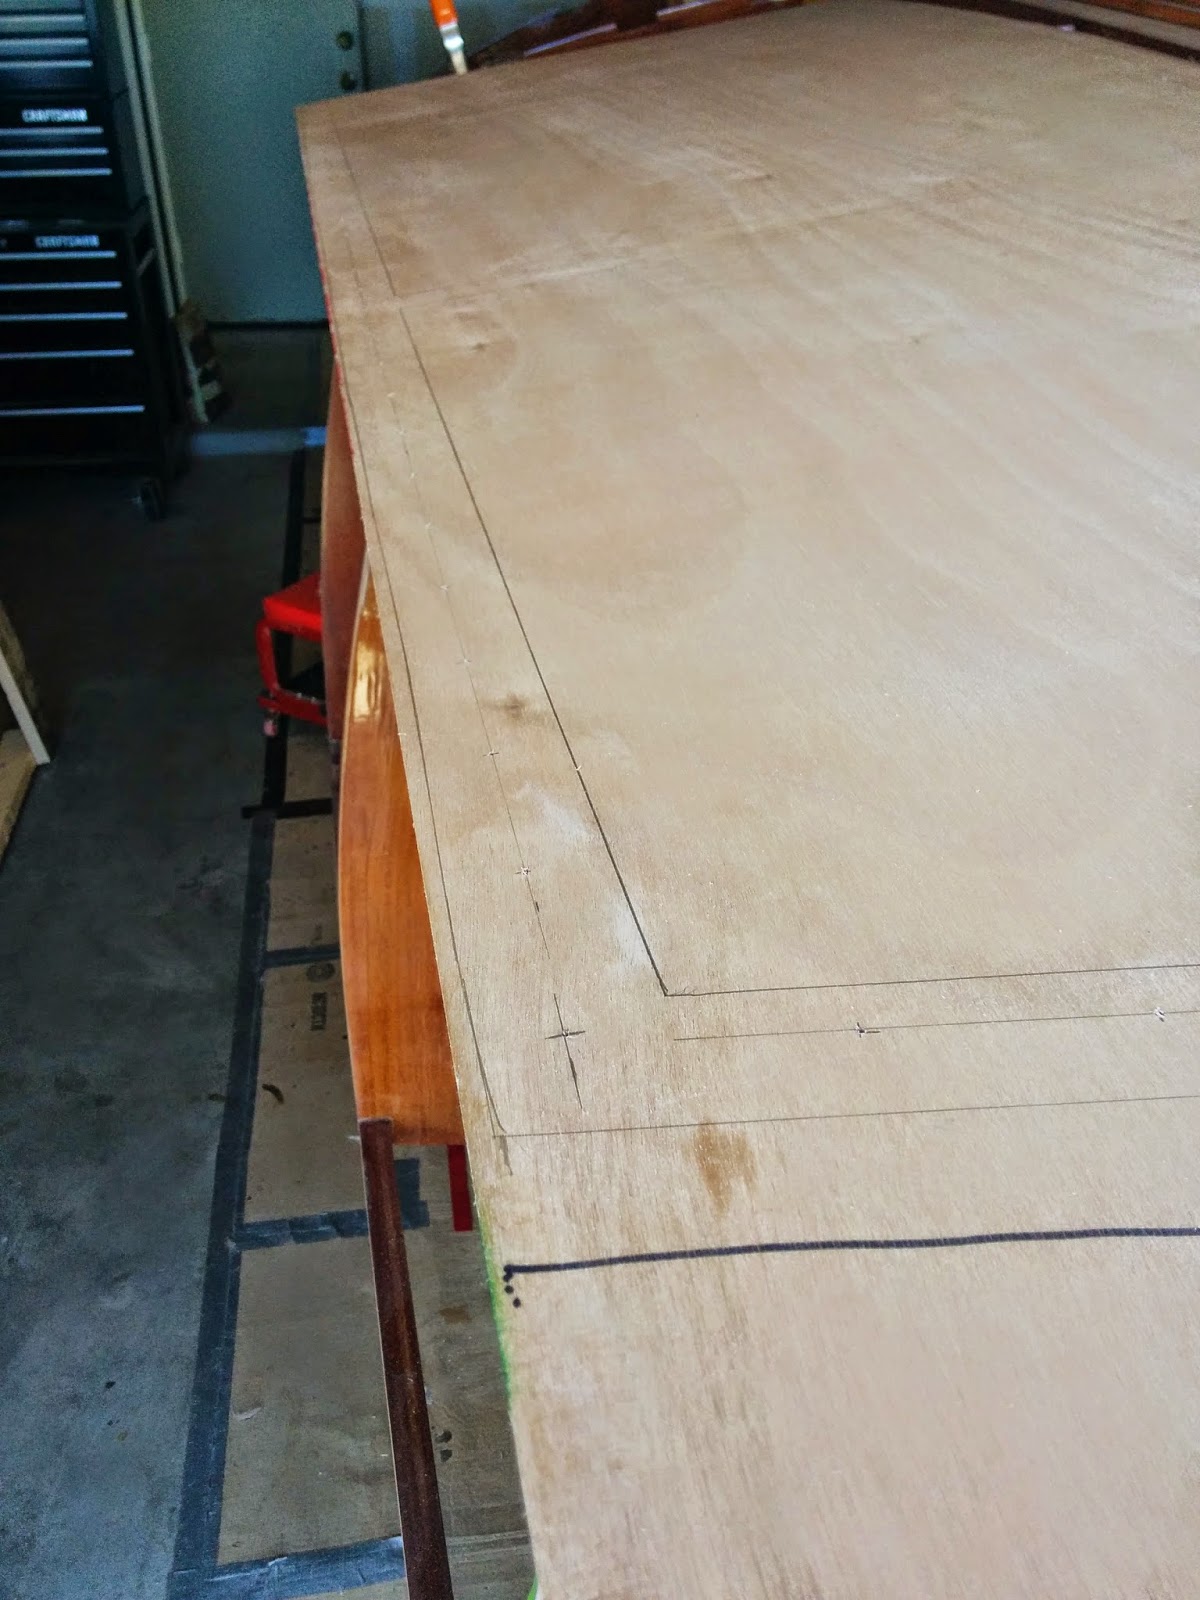
After the last posting, I still had some encapsulation to finish up, namely the forward part of the chine inner surfaces (forward of frame 4) and the sides of the keel. That took approximately 5 days. During that same time I ordered my plywood for skinning as well as the silicon bronze screws I will need for the same task.
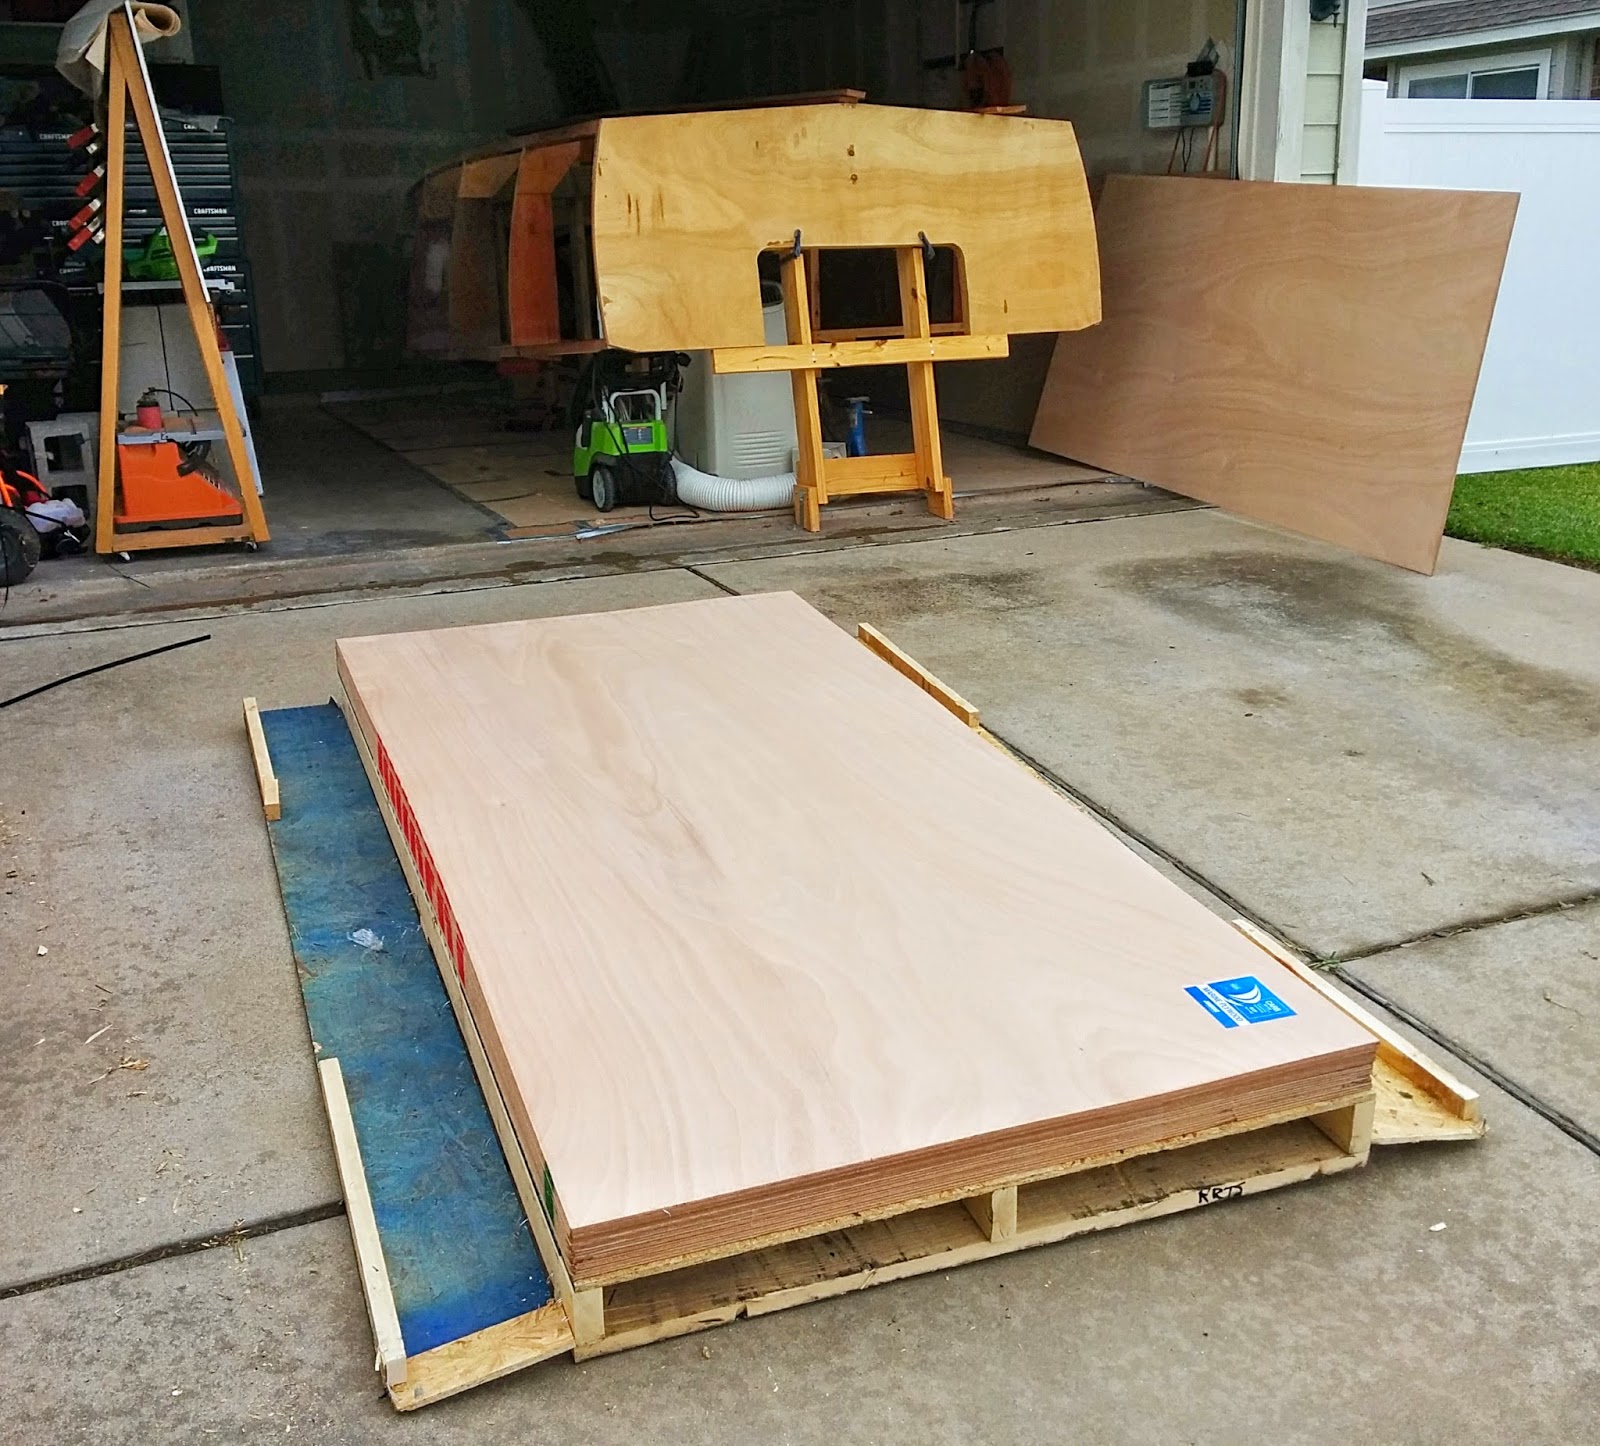
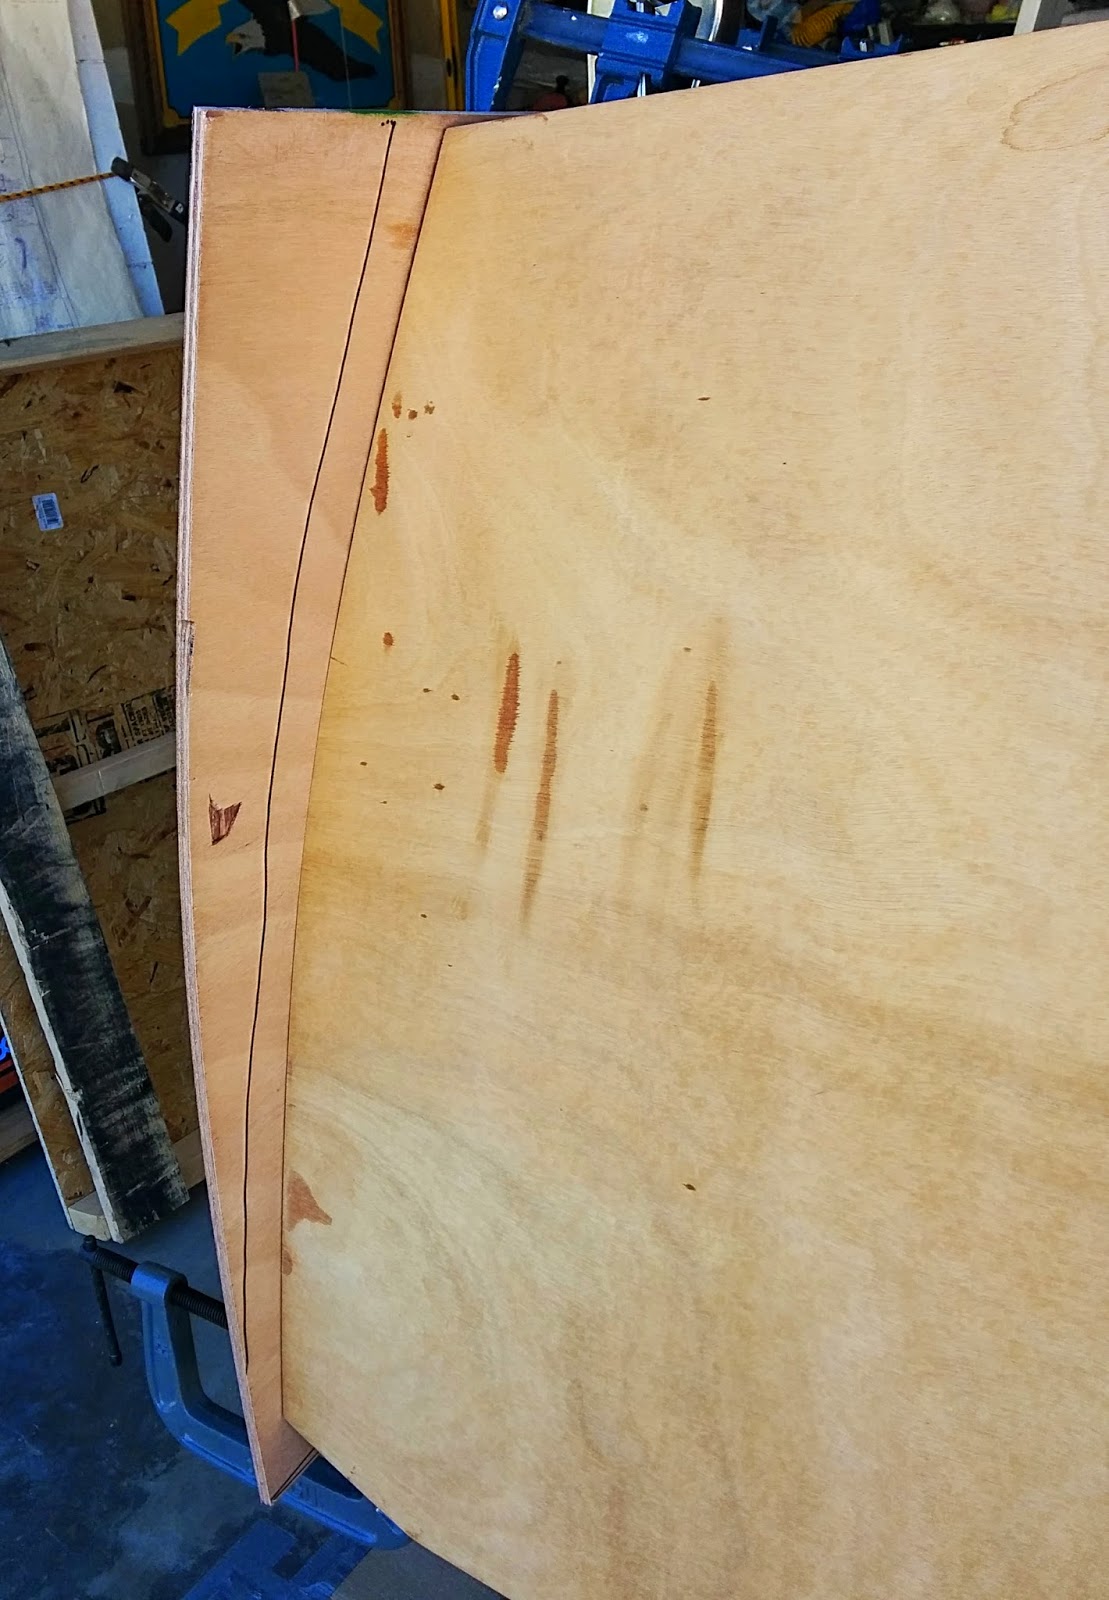
The plywood, like the other plywood I have been using is Joubert brand Okoume BS1088 Marine Grade. I needed 12 sheets of 9mm (3/8"). The plans actually call out for 11 sheets, but I wanted an extra in case there were problems during the skinning process.
Also like the other plywood, this material is pricey. I had to start saving money for this early in the year. I emailed several vendors to get quotes and ended up choosing Homestead Hardwoods in Ohio. The wood was purchased and delivery arrangements made. All of this occurred on Tuesday, Oct 28th.
This last Thursday, the material arrived and was in good condition.
While I have been anxiously awaiting this moment, I was also somewhat apprehensive. I think the feeling is similar to how I was feeling last year when I finally stopped working on the frames and started putting the building form together. I had gotten quite comfortable with seeing this boat skeleton in my garage and doing the various things that needed to be done. Skinning is a new ball game and I am probably going to worry about the fit of every piece until I get them all in position.
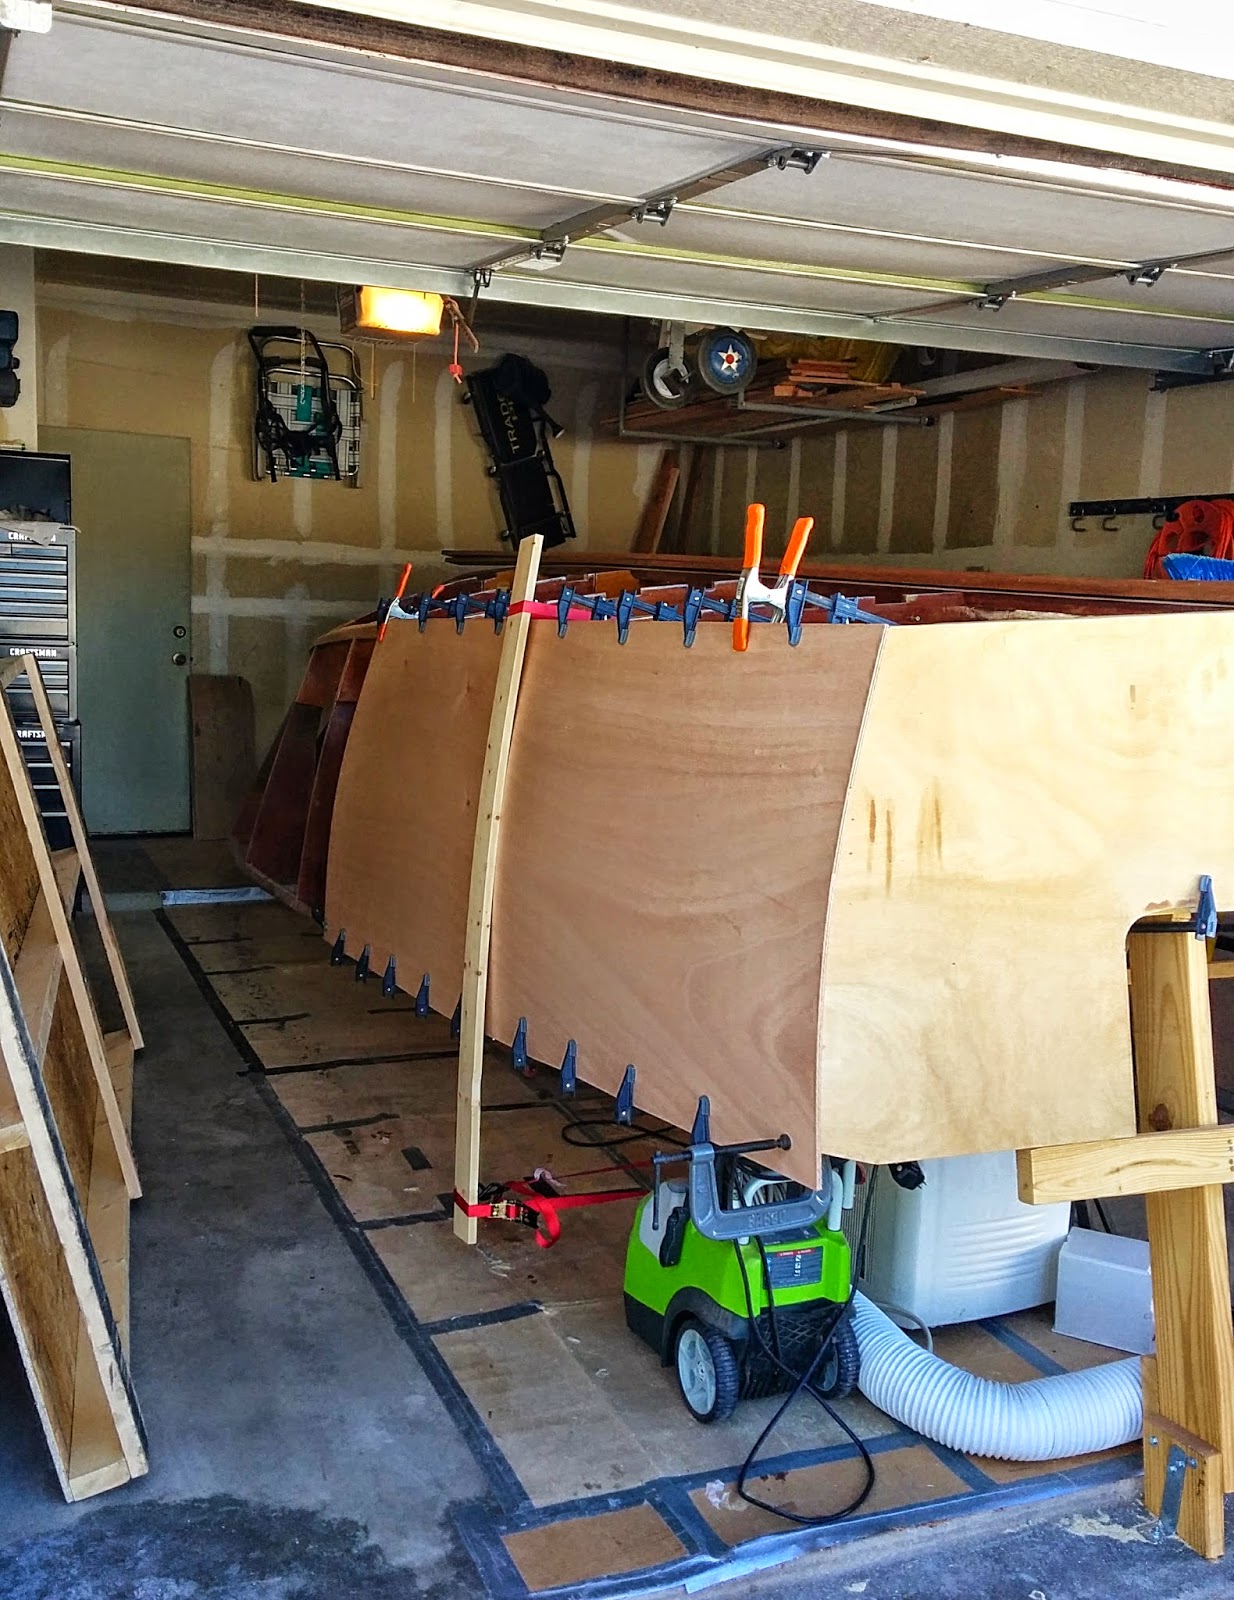
Of course, the first day, I had to try a temp fitting just to see how it was going to look. After clamping the top edge to the chine, I had to come up with a method to bend the sheer edge in towards the sheer.
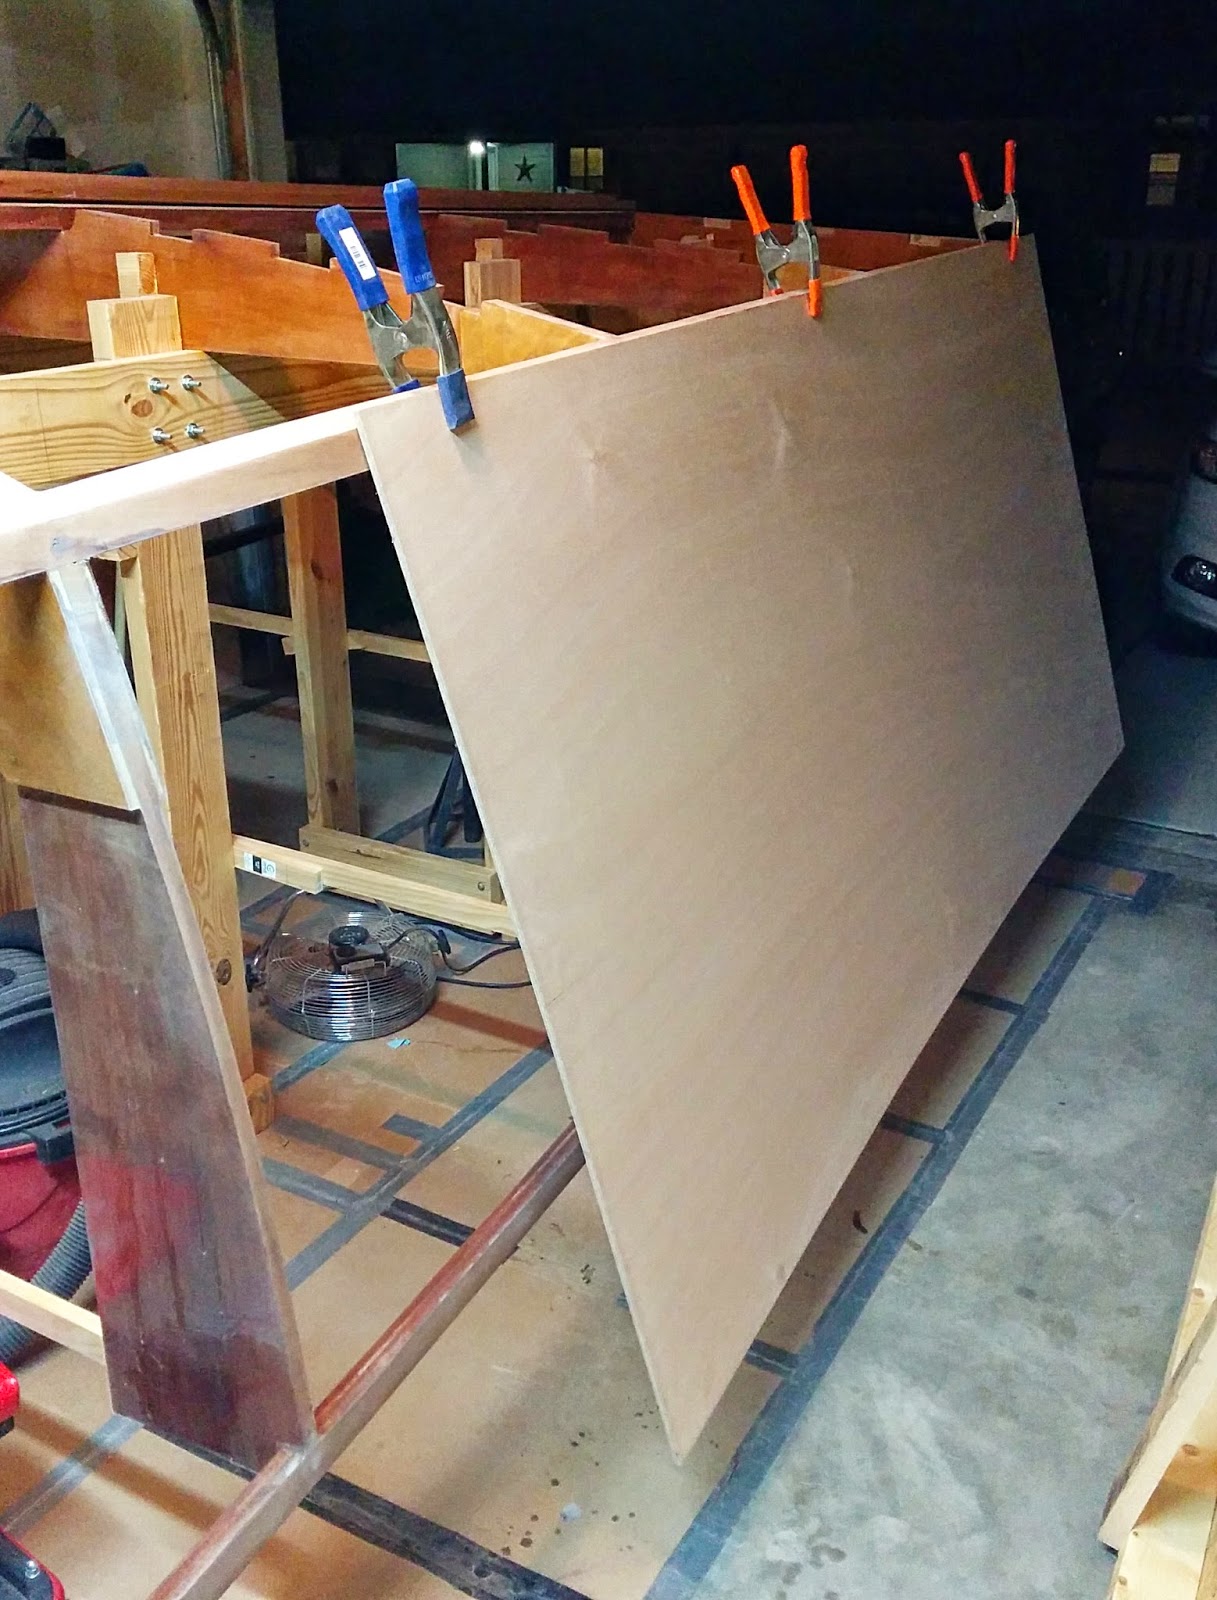
My first concern was that I would need to trim the panel to a closer fit on the hull. But in order to do that, I needed to have the panel bent and clamped into position. How to do that? I thought about using the ratcheting straps I used for the chine, but I didnt feel like that was going to be easy to do.
Instead what I did was take a 1 by 4 piece of scrap lumber and ratchet strap it to the building form above and below the panel (in the center of the panel). Then I ratcheted the panel down until it was close. From there, I was able to use my regular clamps and clamp it to the sheer at both ends.
I was able to mark the plywood along the bottom edge about 2 inches from the sheer. I also marked it about an inch from the transom on the back end of the panel. The sheer line would be cut before re-installing the panel. This would make that edge short enough that I could clamp the entire length along the sheer. The excess on the transom end will be cut off after the panel is glued into position. All of the marks were oversize so a to give me some wiggle room with placement. I will trim these later after the panel is glued into position.
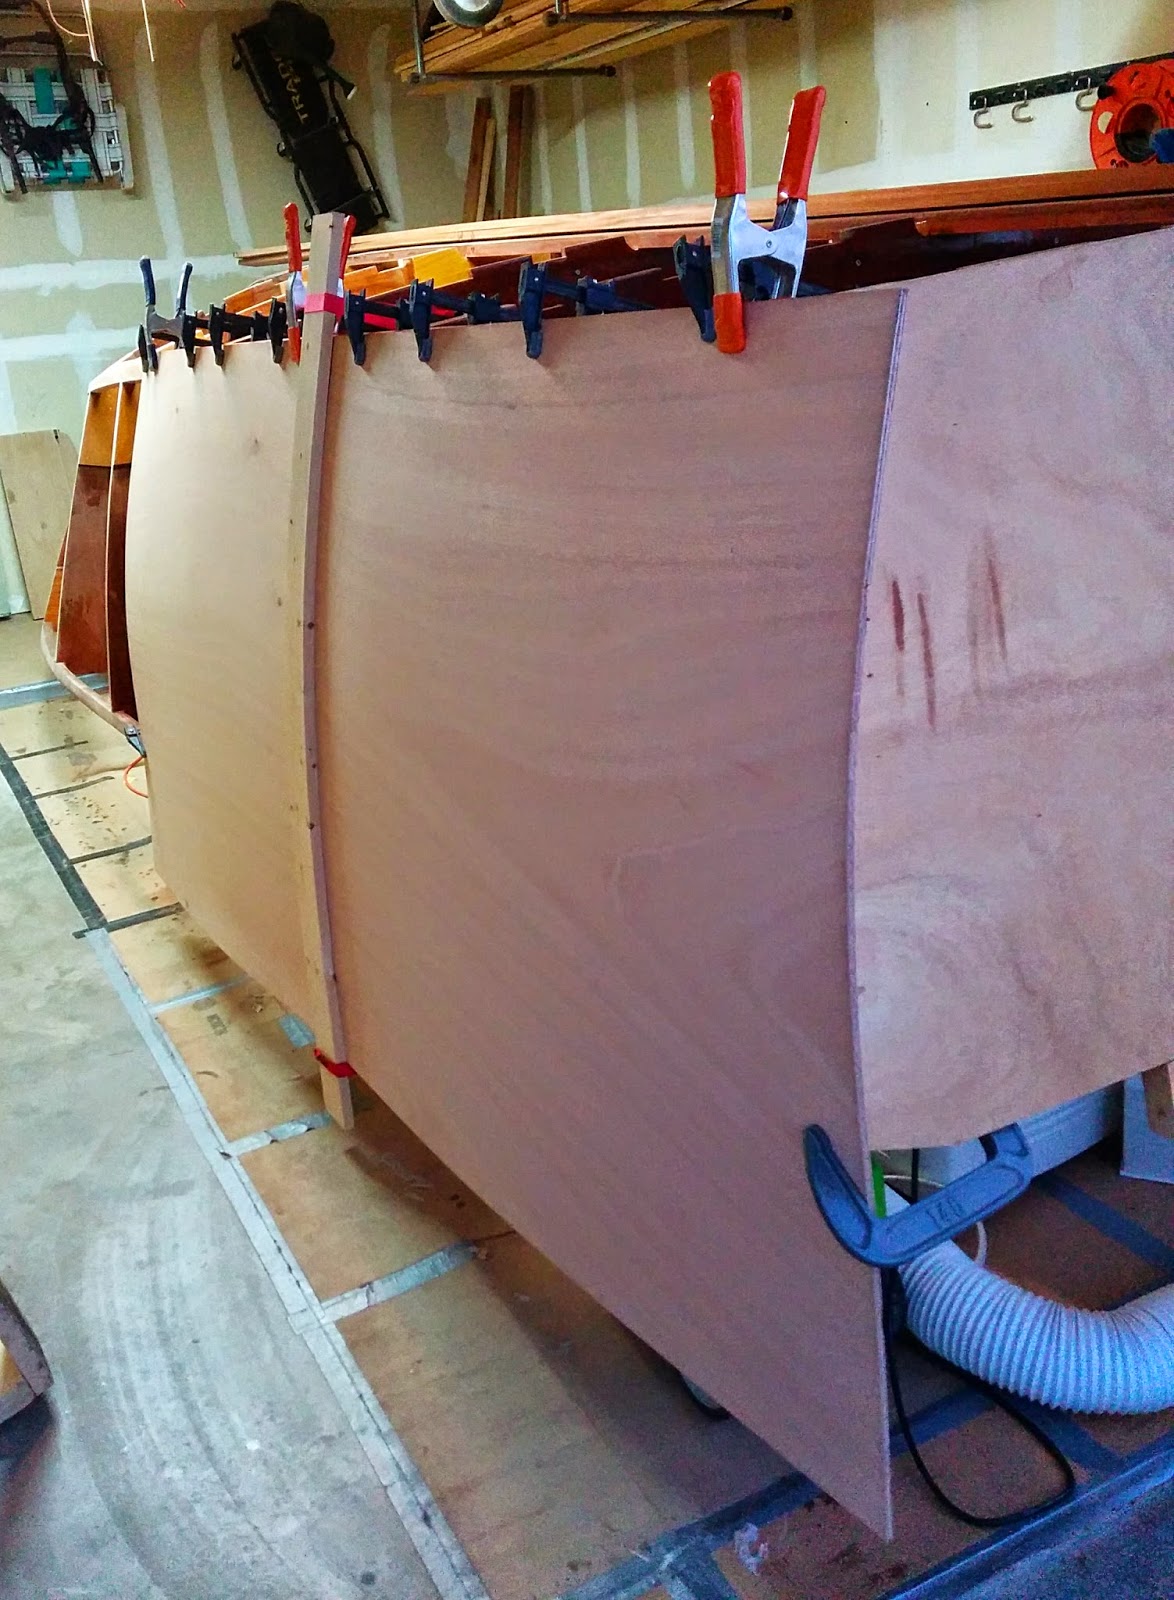
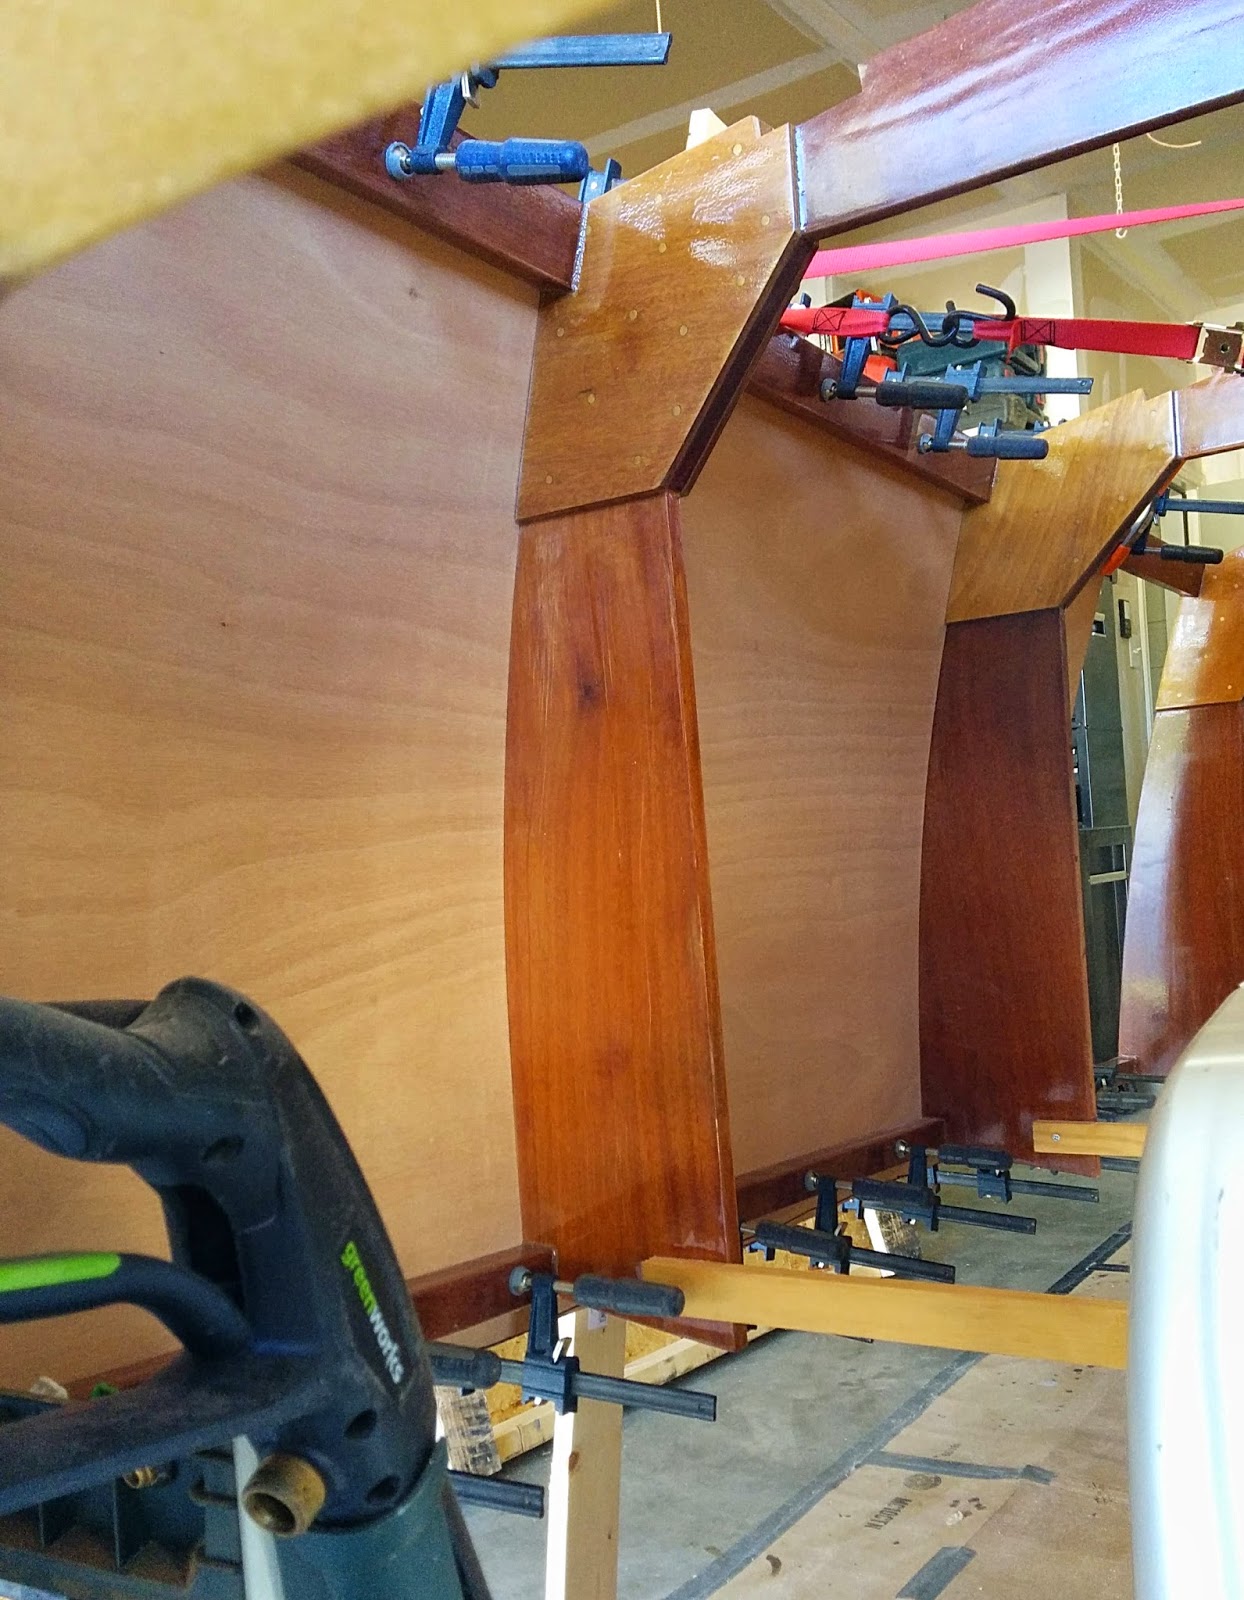
After trimming the panel, the next step was re-installing it to see how it actually fit. I also wanted to set up guide points for installation when I was ready to glue and to layout the screw holes pattern. And I wanted to check the fairing to see if any additional work was needed. This panel required only a very minor amount of fairing at the transom frame where it wasnt quite flat enough. Everything else fit great and no additional work was needed.
The screw hole pattern presented a challenge in that I wanted the holes to fall into the middle of the sheer, chine, and transom frame. But these are not visible from the outside with the skin in place. If the panel would have been exactly cut to the boat hull, I could have simply measured them. But as I mentioned, I wanted to have some wiggle room so the panel extended past all the attachment points.
I tried rigging up a u-shaped bent piece of metal with one leg longer than the other. The idea was I could rest the short leg on the chine or sheer and have a measured point on the long leg to mark the hole location with. But the chine bottom edge is angled differently along its entire length and I found that the hole pattern would have been too close to the edge of the chine at the aft end. This method also didnt work so well at the transom end when trying to locate the transom frame.
The transom frame is only 3/4" thick so I had to be accurate here or risk having the hole come out the side of the frame or miss it entirely. I wasnt confident enough with this method to commit to drilling the pilot holes, so I tried a different approach.
Instead I traced the structure inside the panel. I also made several reference marks on the hull structure so that I could eventually get the panel back into the same exact position. After removing the panel again, I measured from the traced lines and got the hole pattern where I wanted it. These were them drilled with a small pilot drill.
The other thing that I wanted to do was use steel screws and plywood washers to hold the panel in place while the epoxy cured. The panel is permanently attached with silicon bronze wood screws and epoxy. But my experience with the bronze screws was that they are easy to strip the heads and occasionally break when driving into wood for the first time. So I was going to use steel crews for the initial glue up and replace them later with bronze screws after the epoxy cures.
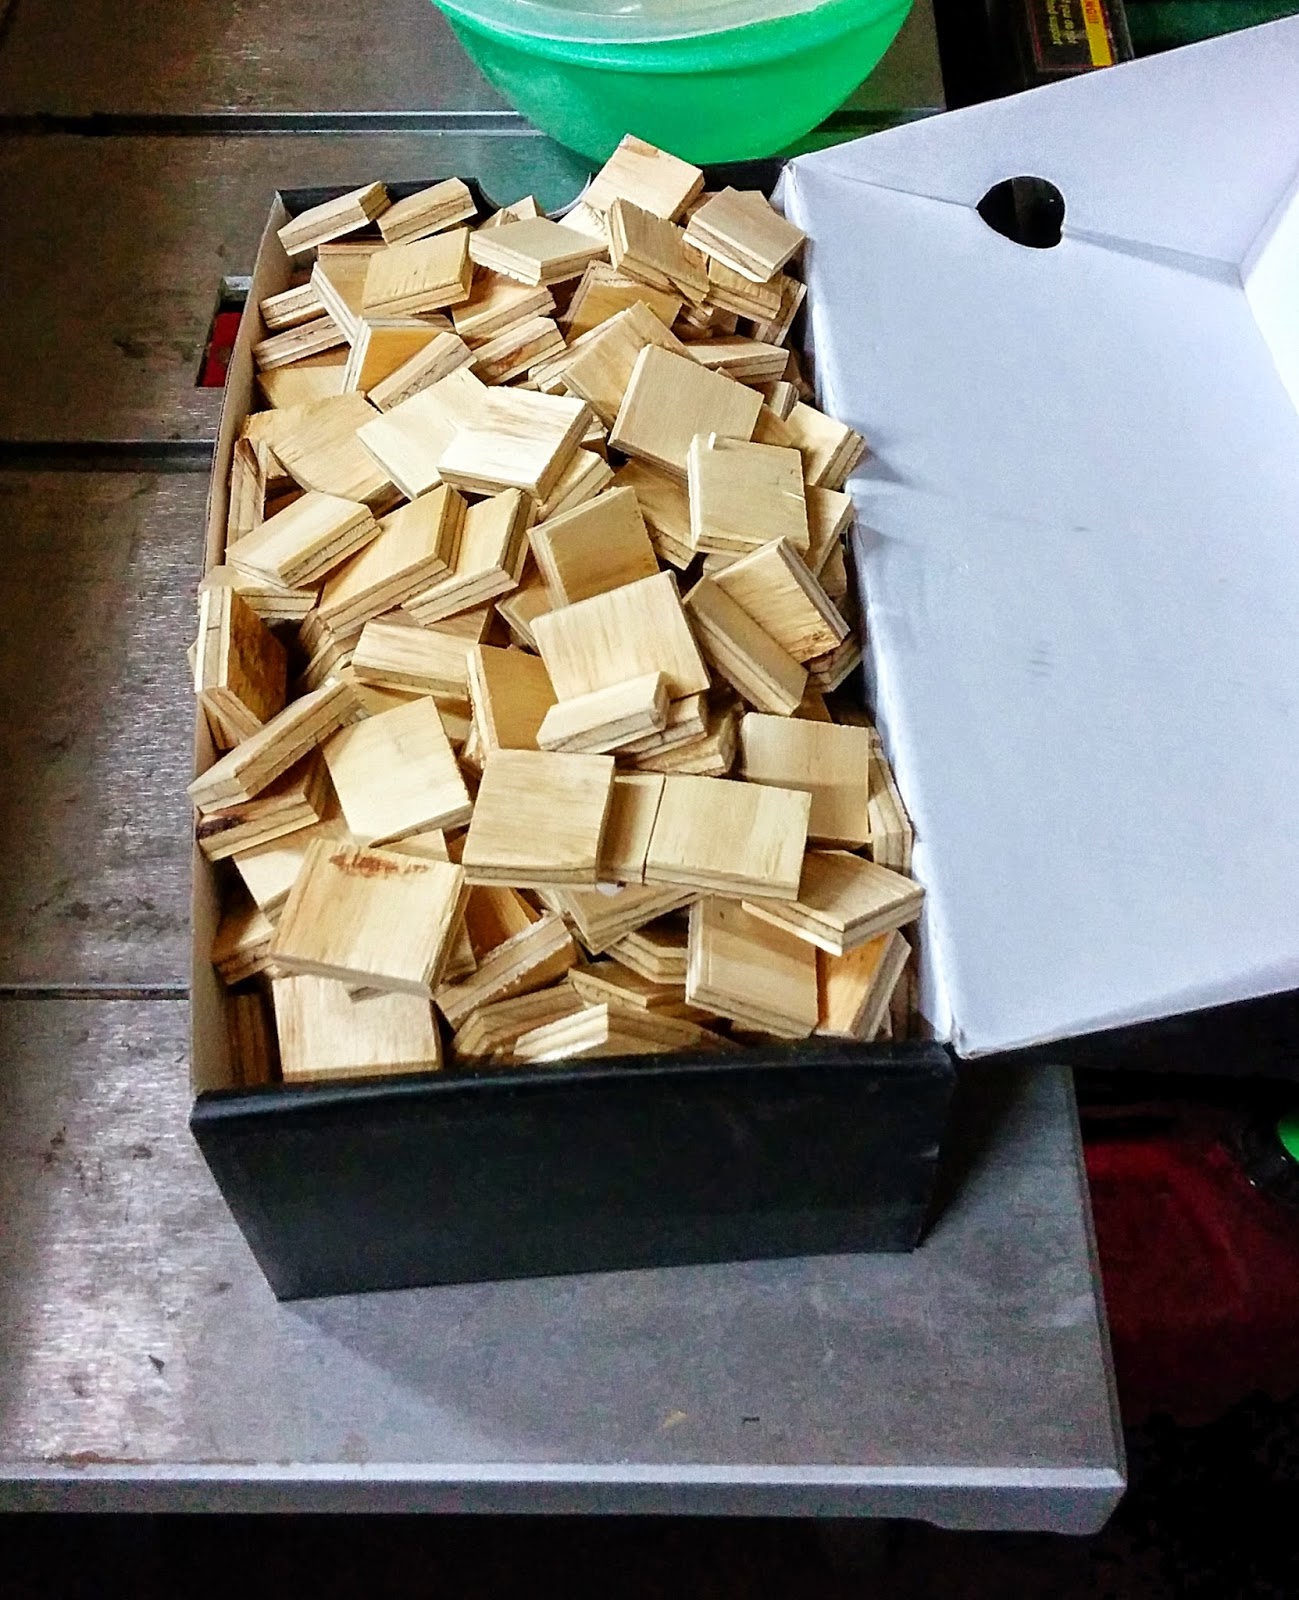
The plywood washers are there to do two things. They spread the load of the screw head when initially driving the panel down and they protect the plywood skin from the screw being driven too deeply in this initial fastening. I planned on clamping the panel into position before screwing but I still wanted to insure that the panel was securely glued at all screw hole points.
So I had to make a bunch of these plywood washers using some scrap plywood I had. I also predrilled all the pieces I would need for the panel installation.
Once I had the pilot holes drilled I temporarily re-attached the panel to the hull and drilled three of the screw holes into the chine. These would serve to insure that the panel could be quickly placed into position once I had the epoxy applied. I didnt want to have to worry about getting the panel into the correct position after gluing because of the short pot life of the epoxy and because I knew that there would be a lot of tasks that had to be completed before the epoxy set up too much.
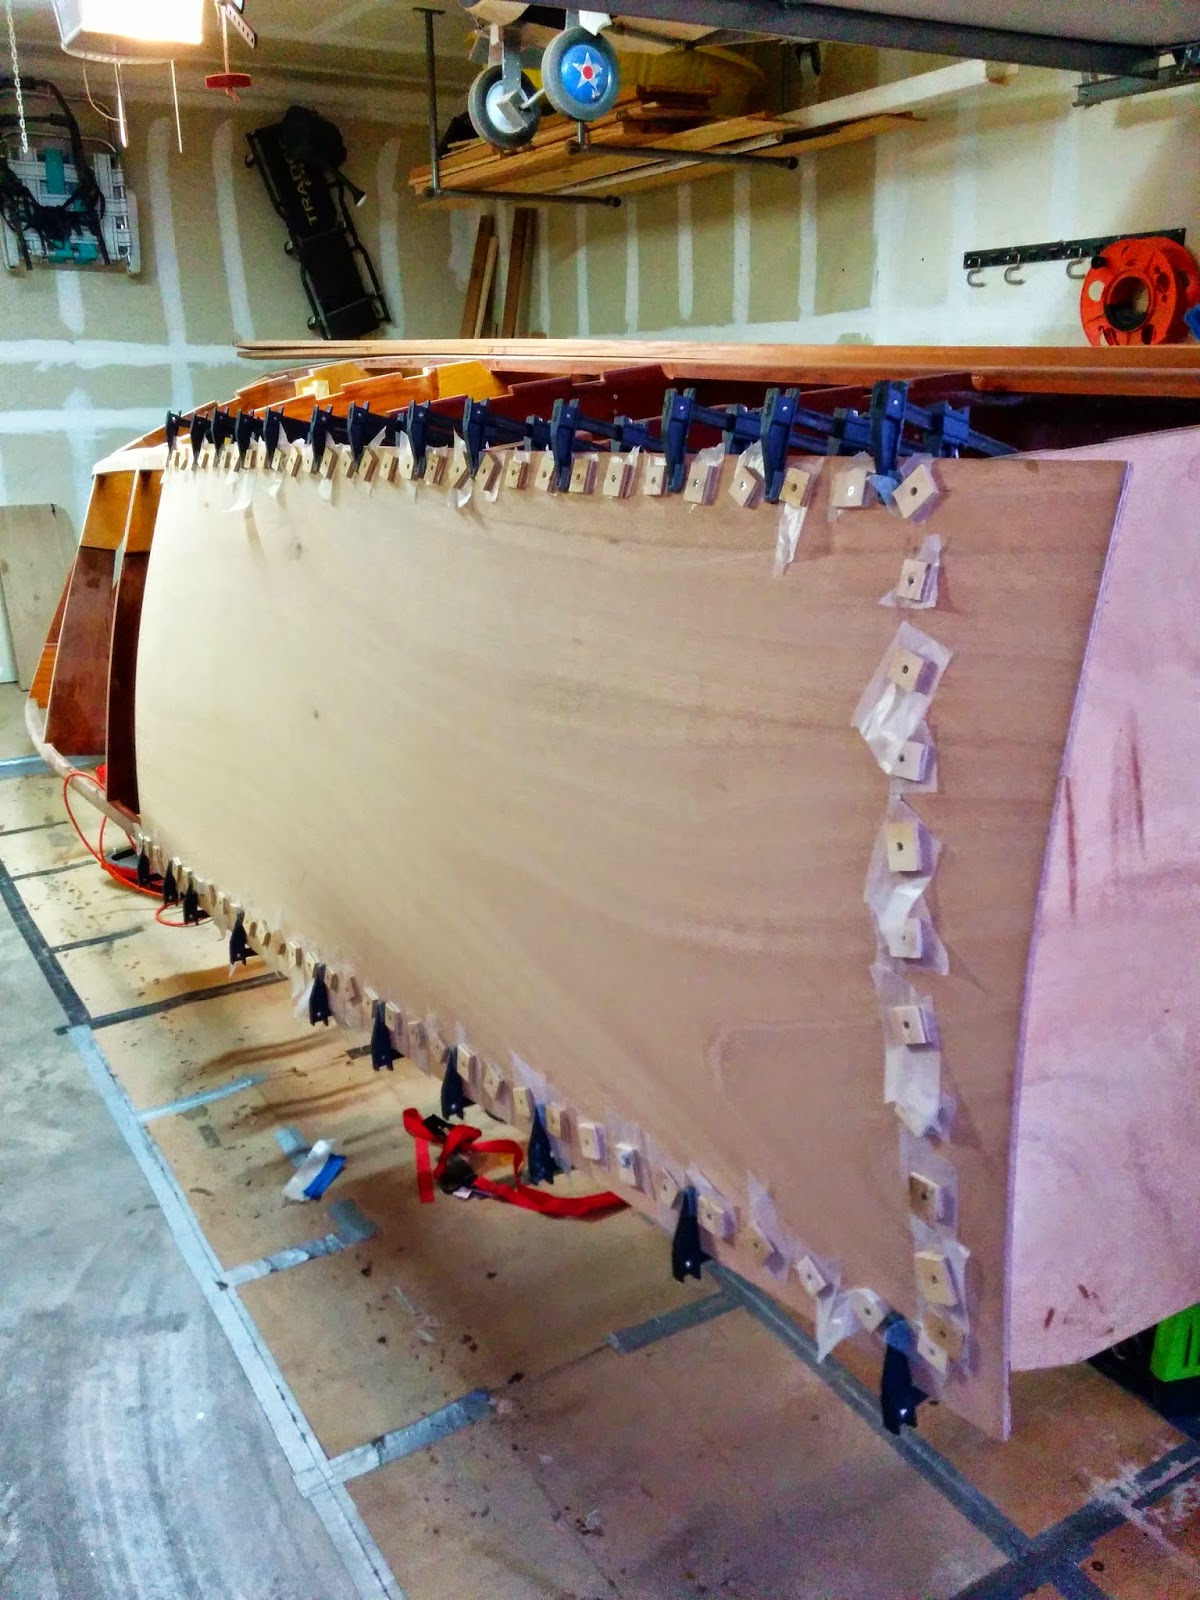
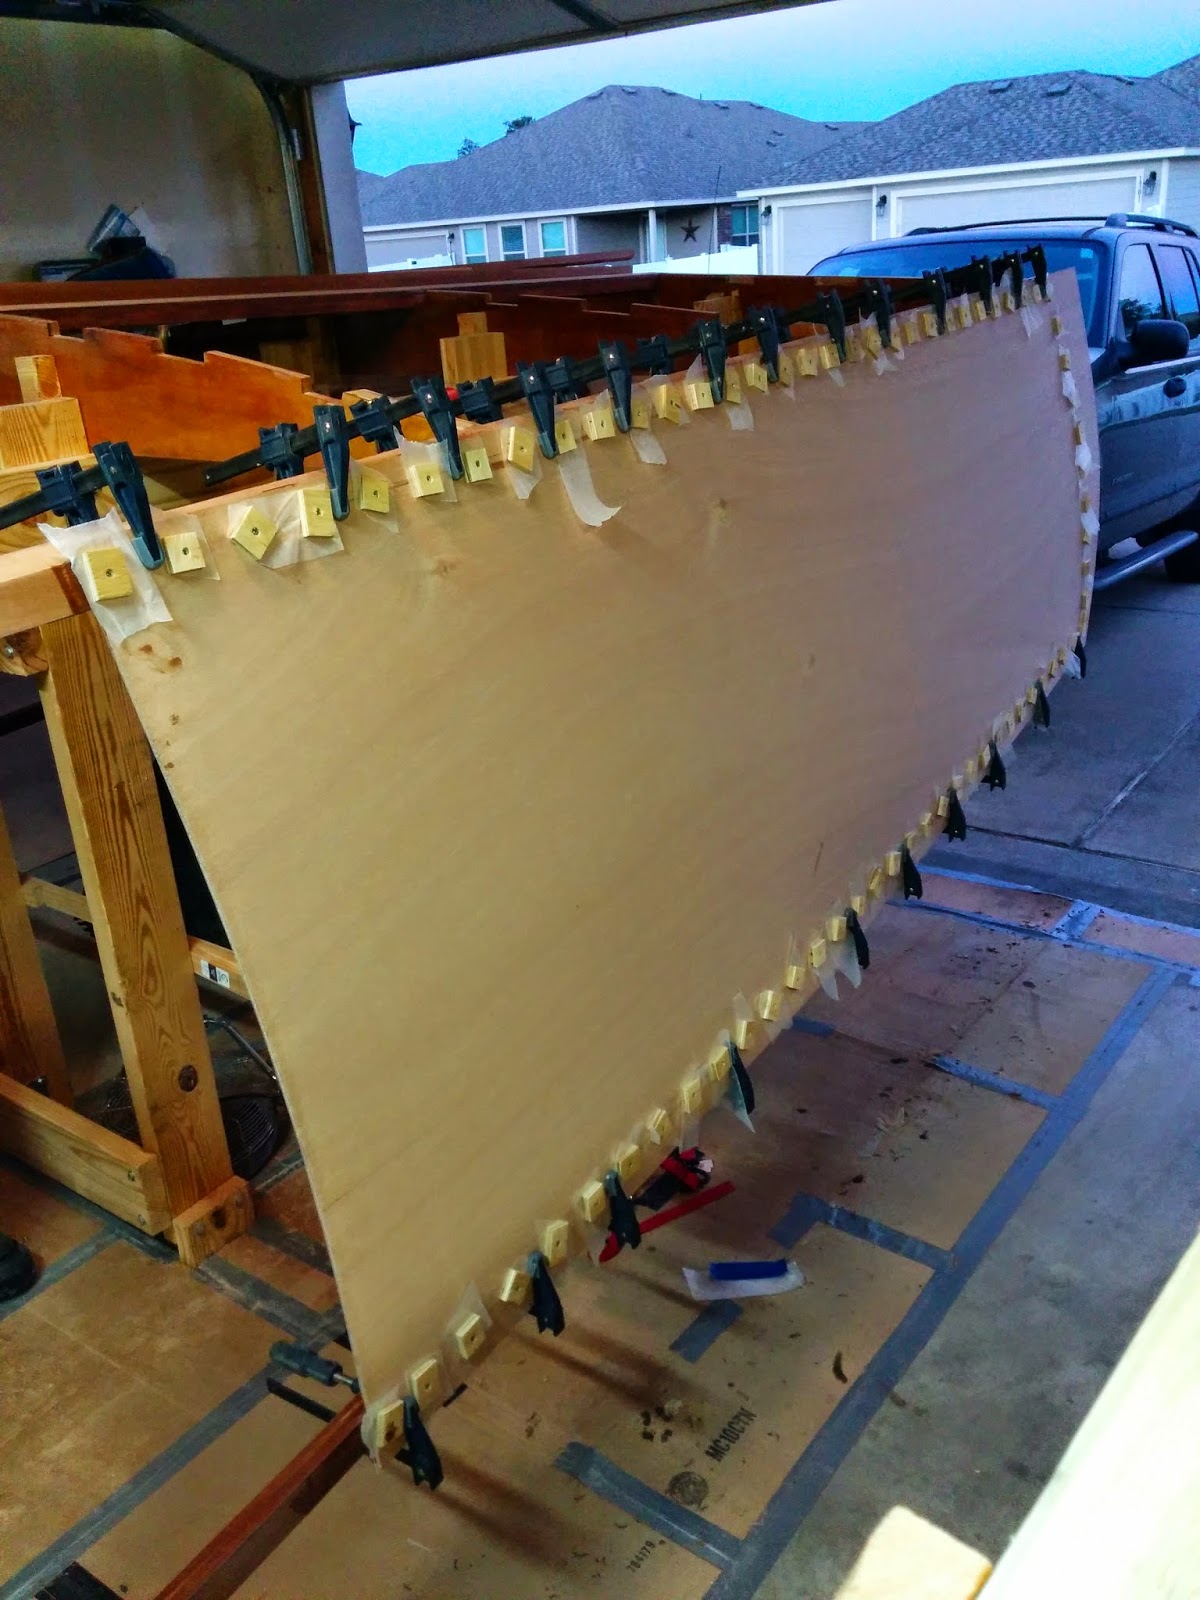
In preparation for gluing, I cut a bunch of wax paper strips for placing under the plywood washers so that they wouldnt stick to the plywood skin. I then pre-coated the skin and frames with the epoxy and then applied thickened epoxy to the frames and installed the panel.
This was rather stressful as I had a large area to glue and I had to work fast. The tracings on the inside of the panel served as guides where to precoat the panel. I didnt want to put epoxy over the entire inner surface at this point (although that will eventually be done later when I encapsulate the skins).
I had to drill the remaining holes into the chine, sheer, and transom frame before I could add the screws. But I made sure to clamp the panel over most of its length first and then filled in the open areas with the screws. Eventually I got all the screws installed.
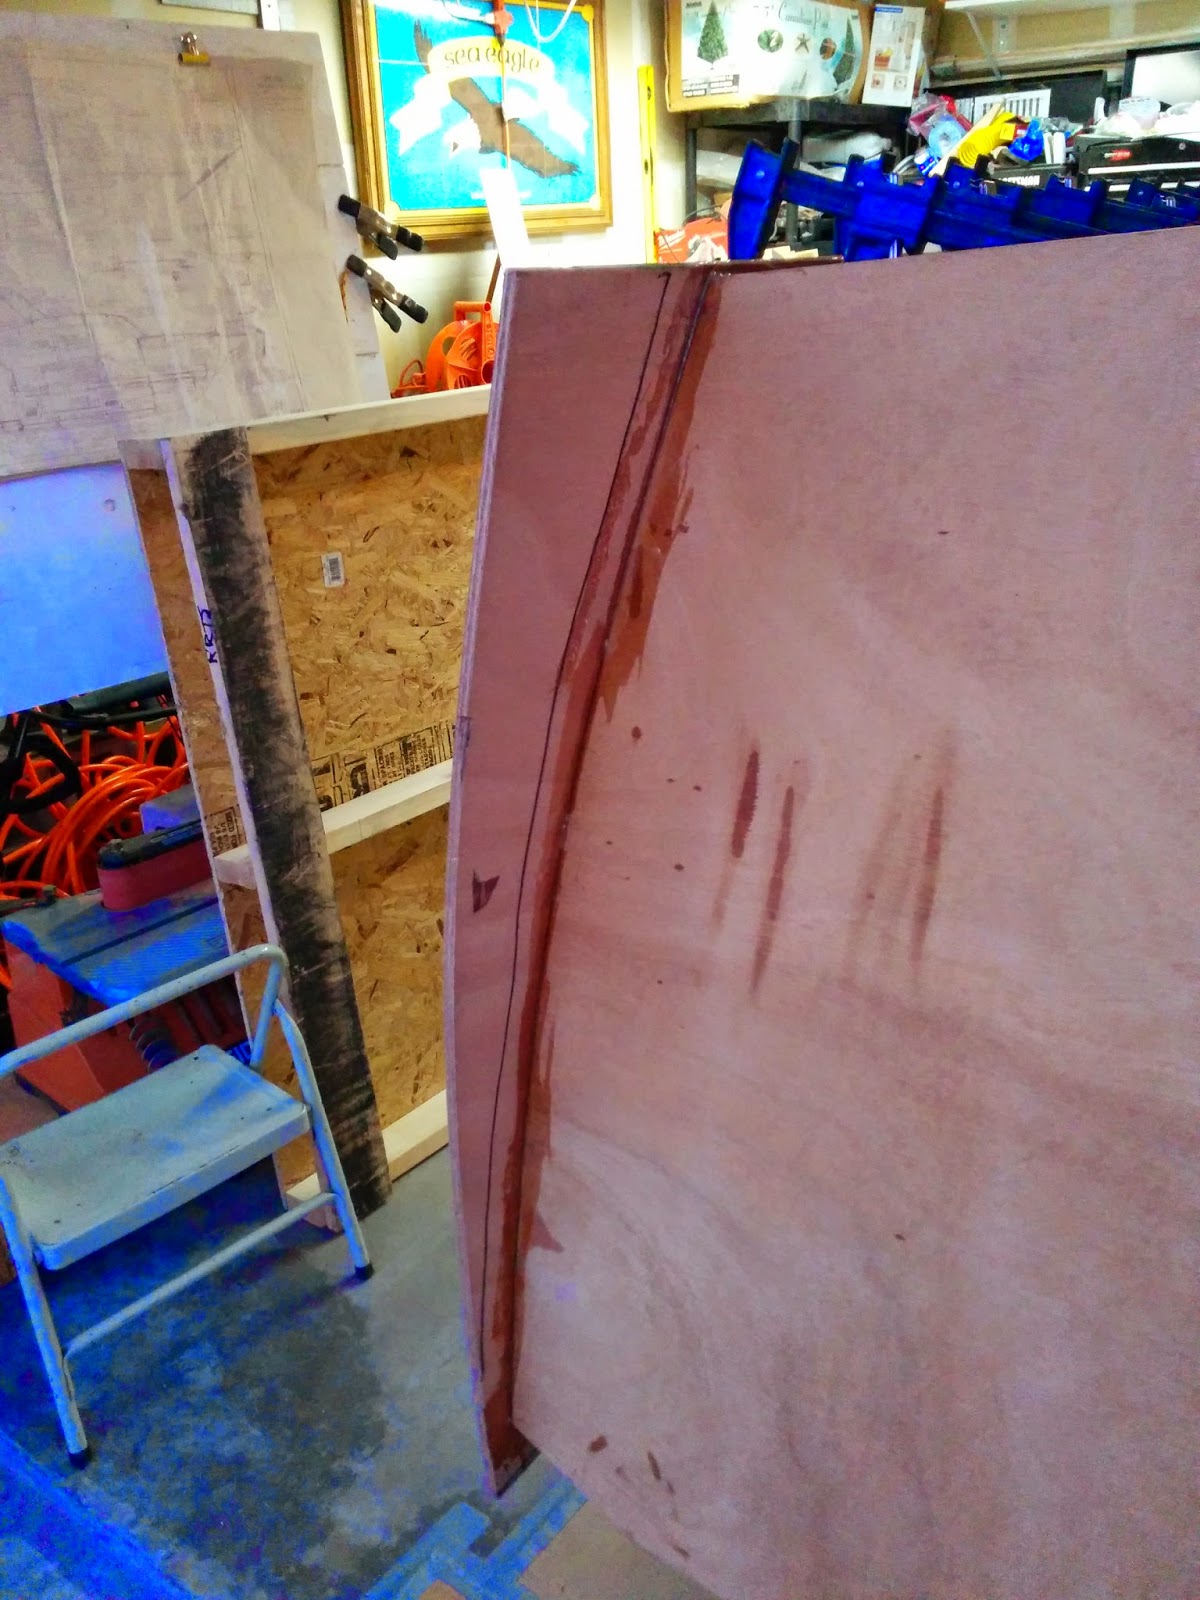
By this time the epoxy was beginning to set up and I still wanted to scrape away the excess to save on clean up work later. I was able to get this done as well. Fortunately, the weather has been mild the last several days. If it would have been as hot as it was this summer, I would have never finished all these tasks quickly enough.
In hindsight, I could have done a few more preparation tasks to help this process get done sooner. I should have predrilled all the holes into the chine, sheer and transom frame. I should have also driven the screws into the plywood washers before doing the glue up. I had to do these tasks while installing the panel and this considerably slowed down the process.
However, this first panel went on smoothly enough and I will have a bit of experience to apply when installing the panel on the other side.
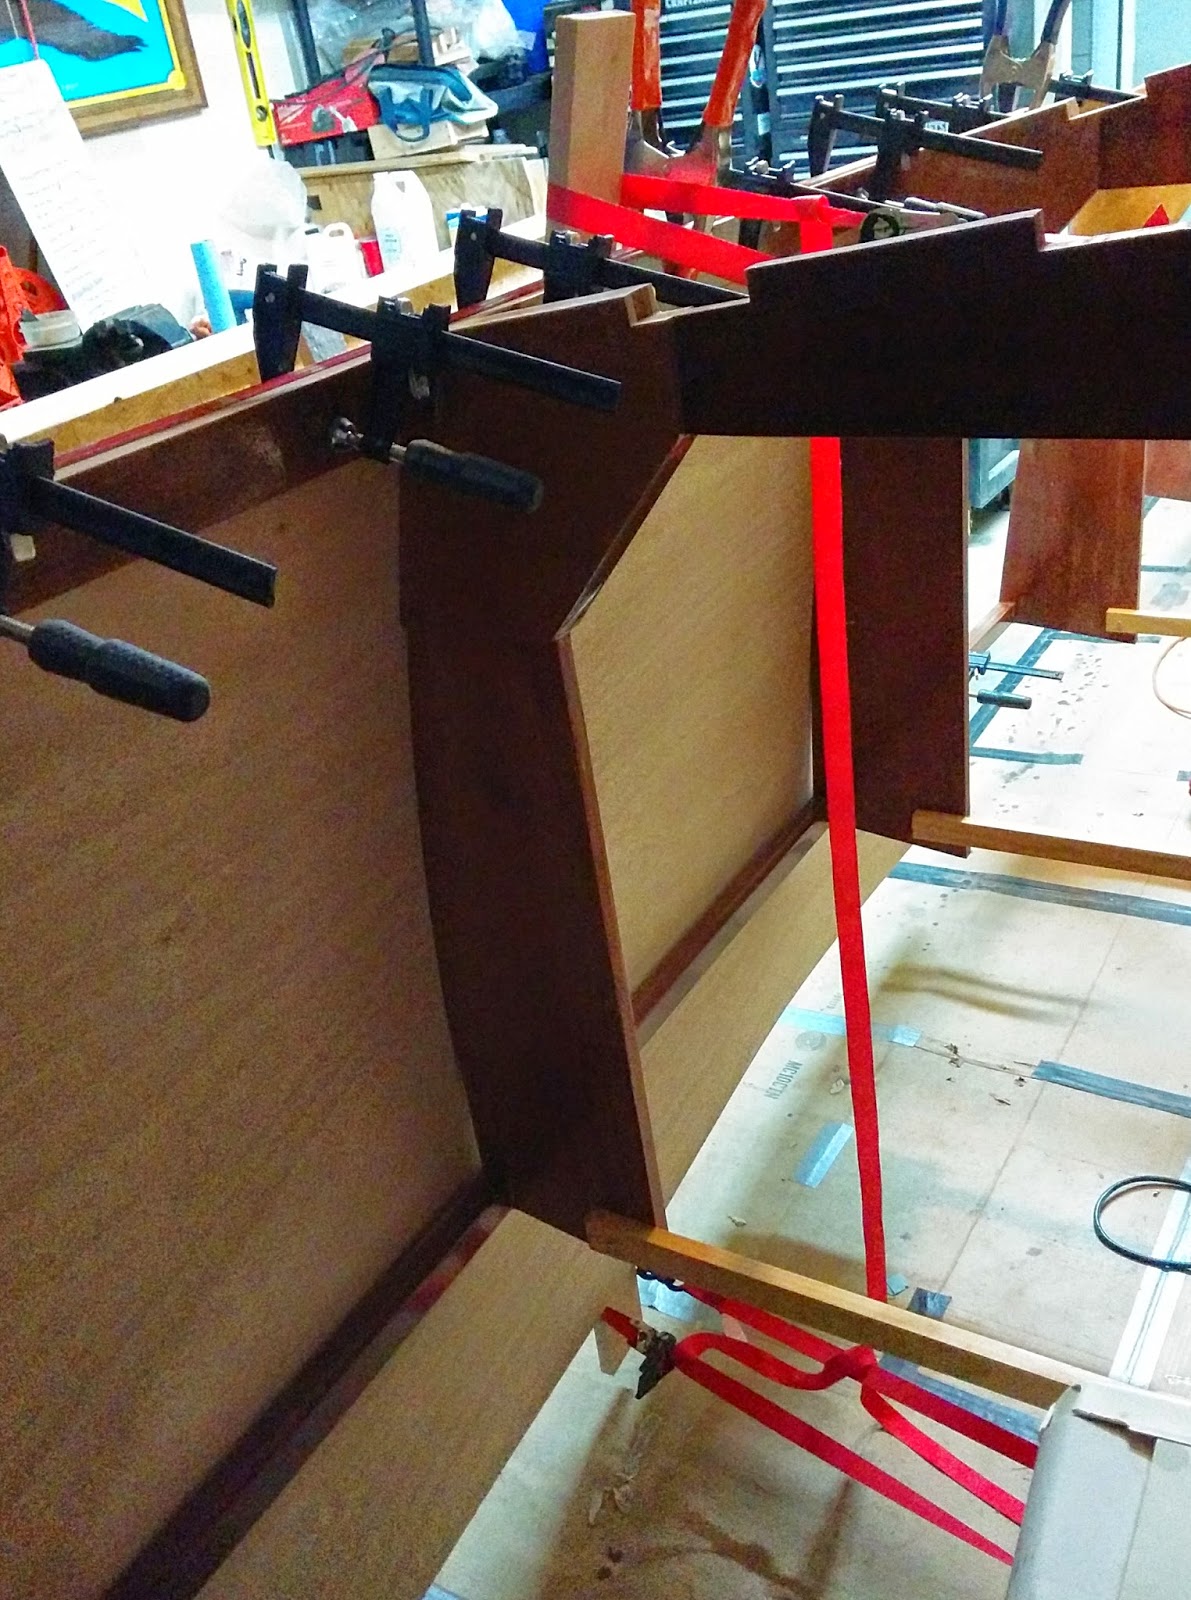
You will notice that this first panel ends in between two frames. There are two ways to deal with this. I can either butt another panel up to this and place a reinforcing patch on the inner surface, or you can make a scarf joint on the panel. Each approach has its pros and cons.
Originally I was going to scarf join three sheets together and then fit the entire 24 foot piece into position. But I recognized that this was going to be very difficult for me to do by myself. Also, a 24 foot piece is too long for my garage and I would have had to leave it outside while the epoxy in the scarf joint cured. I didnt want to do that.
I decided to use the butt joint on the first two panels. This is fine in this area because the boat is relatively flat and the butt joint will not have any trouble conforming to the slight curve of the hull. Butt joints normally need to be placed in the flattest area of the skin or they can create a potential flat spot on the exterior.
However, the second panel will end in the curved area of the hull and the only way I can do this is is with a scarf joint. So I will have to scarf join two panels together before fitting. I am hopeful that the scarf joint will conform to the curve of the hull. I am going to be examining this area more before I do anything, however.
Anyway, its been a great milestone to reach and I am excited to see the hull getting its skin now. I think that to the average viewer, they will see this and finally see a boat. For me, it validates the work I have already done and gets me that much closer to that day when I can turn the hull over and work on the topside.
So until next time, take care.
The plywood, like the other plywood I have been using is Joubert brand Okoume BS1088 Marine Grade. I needed 12 sheets of 9mm (3/8"). The plans actually call out for 11 sheets, but I wanted an extra in case there were problems during the skinning process.
Also like the other plywood, this material is pricey. I had to start saving money for this early in the year. I emailed several vendors to get quotes and ended up choosing Homestead Hardwoods in Ohio. The wood was purchased and delivery arrangements made. All of this occurred on Tuesday, Oct 28th.
This last Thursday, the material arrived and was in good condition.

While I have been anxiously awaiting this moment, I was also somewhat apprehensive. I think the feeling is similar to how I was feeling last year when I finally stopped working on the frames and started putting the building form together. I had gotten quite comfortable with seeing this boat skeleton in my garage and doing the various things that needed to be done. Skinning is a new ball game and I am probably going to worry about the fit of every piece until I get them all in position.
Of course, the first day, I had to try a temp fitting just to see how it was going to look. After clamping the top edge to the chine, I had to come up with a method to bend the sheer edge in towards the sheer.

My first concern was that I would need to trim the panel to a closer fit on the hull. But in order to do that, I needed to have the panel bent and clamped into position. How to do that? I thought about using the ratcheting straps I used for the chine, but I didnt feel like that was going to be easy to do.
Instead what I did was take a 1 by 4 piece of scrap lumber and ratchet strap it to the building form above and below the panel (in the center of the panel). Then I ratcheted the panel down until it was close. From there, I was able to use my regular clamps and clamp it to the sheer at both ends.


I was able to mark the plywood along the bottom edge about 2 inches from the sheer. I also marked it about an inch from the transom on the back end of the panel. The sheer line would be cut before re-installing the panel. This would make that edge short enough that I could clamp the entire length along the sheer. The excess on the transom end will be cut off after the panel is glued into position. All of the marks were oversize so a to give me some wiggle room with placement. I will trim these later after the panel is glued into position.


After trimming the panel, the next step was re-installing it to see how it actually fit. I also wanted to set up guide points for installation when I was ready to glue and to layout the screw holes pattern. And I wanted to check the fairing to see if any additional work was needed. This panel required only a very minor amount of fairing at the transom frame where it wasnt quite flat enough. Everything else fit great and no additional work was needed.


The screw hole pattern presented a challenge in that I wanted the holes to fall into the middle of the sheer, chine, and transom frame. But these are not visible from the outside with the skin in place. If the panel would have been exactly cut to the boat hull, I could have simply measured them. But as I mentioned, I wanted to have some wiggle room so the panel extended past all the attachment points.
I tried rigging up a u-shaped bent piece of metal with one leg longer than the other. The idea was I could rest the short leg on the chine or sheer and have a measured point on the long leg to mark the hole location with. But the chine bottom edge is angled differently along its entire length and I found that the hole pattern would have been too close to the edge of the chine at the aft end. This method also didnt work so well at the transom end when trying to locate the transom frame.
The transom frame is only 3/4" thick so I had to be accurate here or risk having the hole come out the side of the frame or miss it entirely. I wasnt confident enough with this method to commit to drilling the pilot holes, so I tried a different approach.
Instead I traced the structure inside the panel. I also made several reference marks on the hull structure so that I could eventually get the panel back into the same exact position. After removing the panel again, I measured from the traced lines and got the hole pattern where I wanted it. These were them drilled with a small pilot drill.

The other thing that I wanted to do was use steel screws and plywood washers to hold the panel in place while the epoxy cured. The panel is permanently attached with silicon bronze wood screws and epoxy. But my experience with the bronze screws was that they are easy to strip the heads and occasionally break when driving into wood for the first time. So I was going to use steel crews for the initial glue up and replace them later with bronze screws after the epoxy cures.
The plywood washers are there to do two things. They spread the load of the screw head when initially driving the panel down and they protect the plywood skin from the screw being driven too deeply in this initial fastening. I planned on clamping the panel into position before screwing but I still wanted to insure that the panel was securely glued at all screw hole points.
So I had to make a bunch of these plywood washers using some scrap plywood I had. I also predrilled all the pieces I would need for the panel installation.

Once I had the pilot holes drilled I temporarily re-attached the panel to the hull and drilled three of the screw holes into the chine. These would serve to insure that the panel could be quickly placed into position once I had the epoxy applied. I didnt want to have to worry about getting the panel into the correct position after gluing because of the short pot life of the epoxy and because I knew that there would be a lot of tasks that had to be completed before the epoxy set up too much.
In preparation for gluing, I cut a bunch of wax paper strips for placing under the plywood washers so that they wouldnt stick to the plywood skin. I then pre-coated the skin and frames with the epoxy and then applied thickened epoxy to the frames and installed the panel.
This was rather stressful as I had a large area to glue and I had to work fast. The tracings on the inside of the panel served as guides where to precoat the panel. I didnt want to put epoxy over the entire inner surface at this point (although that will eventually be done later when I encapsulate the skins).
I had to drill the remaining holes into the chine, sheer, and transom frame before I could add the screws. But I made sure to clamp the panel over most of its length first and then filled in the open areas with the screws. Eventually I got all the screws installed.


By this time the epoxy was beginning to set up and I still wanted to scrape away the excess to save on clean up work later. I was able to get this done as well. Fortunately, the weather has been mild the last several days. If it would have been as hot as it was this summer, I would have never finished all these tasks quickly enough.
In hindsight, I could have done a few more preparation tasks to help this process get done sooner. I should have predrilled all the holes into the chine, sheer and transom frame. I should have also driven the screws into the plywood washers before doing the glue up. I had to do these tasks while installing the panel and this considerably slowed down the process.
However, this first panel went on smoothly enough and I will have a bit of experience to apply when installing the panel on the other side.
You will notice that this first panel ends in between two frames. There are two ways to deal with this. I can either butt another panel up to this and place a reinforcing patch on the inner surface, or you can make a scarf joint on the panel. Each approach has its pros and cons.
Originally I was going to scarf join three sheets together and then fit the entire 24 foot piece into position. But I recognized that this was going to be very difficult for me to do by myself. Also, a 24 foot piece is too long for my garage and I would have had to leave it outside while the epoxy in the scarf joint cured. I didnt want to do that.
I decided to use the butt joint on the first two panels. This is fine in this area because the boat is relatively flat and the butt joint will not have any trouble conforming to the slight curve of the hull. Butt joints normally need to be placed in the flattest area of the skin or they can create a potential flat spot on the exterior.
However, the second panel will end in the curved area of the hull and the only way I can do this is is with a scarf joint. So I will have to scarf join two panels together before fitting. I am hopeful that the scarf joint will conform to the curve of the hull. I am going to be examining this area more before I do anything, however.
Anyway, its been a great milestone to reach and I am excited to see the hull getting its skin now. I think that to the average viewer, they will see this and finally see a boat. For me, it validates the work I have already done and gets me that much closer to that day when I can turn the hull over and work on the topside.
So until next time, take care.
0 Response to "Finally Skinning Begins"
Post a Comment